
REFERENCE
 |
Presentation Wizard will create interactive slide shows, electronic books and brochures, multimedia presentations and just about anything else you can think of that will fit in a window. Unlike other presentation packages, however, its document files are entirely self-displaying. It writes Windows EXE application files which can subsequently be viewed without any additional software. Presentation WizardÆs presentations can be e-mailed, downloaded from a web server, distributed on disk or CD-ROM and generally passed around without worrying about their eventual recipients having specific viewing software installed on their systems. Any computer running Windows 95, 98, ME, NT 4.0 or better or Windows 2000 will be able to play a Presentation Wizard file. Presentation WizardÆs documents can include an essentially unlimited number of pages. Each page can contain as many objects as you like, subject only to the bounds of disk space and good taste. An object can be:
Presentation Wizard can be as simple or as involved to use as you like. If all you want is an electronic photograph album of your ten favourite pictures of your trip to watch the lemmings run in Palo Alto, youÆll need do little more than insert pages for each picture, add the image files and select Save from the File menu. However, if youÆd like to build an interactive guide to the scintillating night life in legendary McMurdo Sound, Antarctica, complete with digitized penguin noises and a video clip of Roald Amundsen uttering the immortal words "weÆve reached the south pole and I canÆt find my slippers," Presentation Wizard will handle that, too. Create clickable advertisements so sophisticated as to sell things to people who have been dead since before the invention of money; electronic books that will save millions of acres of old growth forest; tutorials that will successfully teach quantum physics to cats, streptococcus bacteria, some types of bricks, wool, part of a cheese sandwich or even liberal politicians... supply the imagination and Presentation Wizard will supply things that flash, beep, squawk, scroll and beg to be clicked. This document is an encyclopedic reference for all the functions of the Presentation Wizard software. If you have not already done so, please read the Tutorial document installed with Presentation Wizard. It will walk you through the basic operation of the software and provide you with step by step procedures for performing the most common tasks that Presentation Wizard is called upon to do. Index:
Select About from the Help menu to see the About dialog for Presentation Wizard. If you're evaluating an unregistered copy of Presentation Wizard, you will no doubt be familiar with this dialog. It's worth noting that it will not appear when you exit a registered copy of Presentation Wizard, nor will it talk. The About dialog will tell you which version of Presentation Wizard you're presently using, including the patch number if there is one. This information is important if you have cause to contact us with a bug report or a question about the software.
Presentation WizardÆs Animation objects contain animations imported from MNG files. You can add an Animation object to a Presentation Wizard page by right-clicking anywhere on the background area. Select Insert from the menu which appears, and then Animation from the Insert sub-menu. You can edit an existing Animation object by double-clicking on it, or by right-clicking on it and selecting Edit from the menu which appears. See the section of this document which deals with the Page Editor for more about adding, deleting and editing objects. The Animation editor includes the following fields: Left and Top: The Left and Top fields will allow you to define the location of the upper left corner of an Animation object. Number: The Number field specifies the number of an Animation object. Visible: The Visible option defines whether an Animation object is visible – fairly obvious, this one. Enabled: Enable the Enabled item to create an Animation object which begins playing as soon as the page it appears in is displayed. Disable this item to create a disabled Animation object – one which will presumably be enabled by a later notification. Notify: Enable this item to have the page object selected by the Target Object control notified when the Animation object in question finishes. Target Object: This item selects the page object to be notified when the Animation object in question finishes. Preview: Click on this button to view the Animation object being edited.
ItÆs usually a breathtakingly bad idea to allow an Animation object to overlap another object on your page. Animations in a presentation running on a system which can only display 256 colours are a bit of a pig, and there are some things you'll want to keep in mind about them. Presentation Wizard manages animations in a way that allows them to be displayed using as little memory as possible – such that your presentations will run reliably on machines with reduced resources. This restricts how its animation driver can deal with 256-colour displays. You might find that animations run more slowly than they should in the Presentation Wizard page editor if your system is running with a 256-colour screen driver. They'll run at something approaching their normal speed in your actual presentations. You might also notice some pronounced colour shifts in animations displayed on 256-colour machines. None of this applies to Presentation Wizard itself or to the presentations it creates if they're running on a system which supports more than 256 colours. As this comprises most of the civilized world at the moment, you probably won't want to get too bent out of shape about 256-colour issues.
The applet facilities of Presentation Wizard will allow you to embed sophisticated programs within your pages. Applets are written in a language called ANIMAL, which was developed specifically for use in Alchemy Mindworks applications. If you haven't tried to actually write a program before, this probably sounds a bit terrifying. The important thing to know about ANIMAL is that it was written to be really easy to understand. Even if you're certain that the closest you want to get to a computer language is listening to the salespeople at Staples, you'll be able to master ANIMAL in an afternoon. No foolin'. Having said this, the ANIMAL language is a bit more involved than pointing and clicking. To this end, it's discussed in a document of its own, the ANIMAL Language Reference. You'll need to read this before you can start writing your own applets. Applets have two general purposes in a Presentation Wizard page:
The latter is by far the more useful for most Presentation Wizard documents. When you add an Applet object to a Presentation Wizard page, it will contain a very simple applet, to wit:
This applet, predictably, doesn't do anything. Editing an Applet object will call up the applet editor. Unlike the other object editors, this one's pretty sophisticated. It's a program text editor and an ANIMAL applet preview. You can create applets with the editor, and run them to see what they'll look like when they're part of your presentation. The Applet editor has its own tool bar. Here's what its buttons do:
In writing programs, you will invariably encounter program errors. If you write a program which includes errors, the View command of the Applet editor will terminate and tell you what's wrong. It will position your cursor at the beginning of the line where the error is. Fix the problem and click on View again. It's worth noting that ANIMAL is vastly easier to use than Java – it's arguably even easier than BASIC. Furthermore, because ANIMAL lacks commands which can access the system resources, memory or hard drives of your computer, it's impossible to write an ANIMAL applet that can hurt your system. The worst possible outcome of a badly-written applet will be an error message. The Picture and Sound functions of the Applet editor allow you to open and manipulate graphics and sounds for use in your applets. While the details of the ANIMAL functions that use these objects is a matter for the ANIMAL Language Reference, noted earlier, you might want to experiment with these functions if you're planning to write applets which use images or sounds. The Picture dialog will allow you to import graphics from JPEG, PNG, PCX, BMP and TGA source files. See the discussion of Image objects elsewhere in this document for more about how this works. You can add pictures to an applet by opening the Applet Pictures selector dialog and clicking on Add. The File Open dialog that appears will allow you to select multiple files if you like. Each image will be displayed in the Applet Pictures dialog's list window, along with its reference number displayed in the upper right corner of the picture area. Once they're assigned, these reference numbers never change. Reference numbers are used to access pictures from within an applet.
You can edit an image in the Applet Pictures dialog by clicking on it and clicking on the Paint button. Doing so will open your graphic in a Paint window. See the discussion of Paint Applications elsewhere in this document for more about this. The Paint function will only make changes to the image imported into your applet – it will not affect the source image file from which it was imported. The Applet Sounds dialog works much the same as the Applet Pictures dialog, save that it imports sounds. WAV sounds will appear as amplitude plots, and MIDI sounds will appear as the word MIDI. The Information button will preview your currently selected sound.
The Properties dialog in the Edit menu of the Applet editor will allow you to set the location and dimensions of an applet numerically, as with other object types. It will also let you set the Parameter value. This is used in developing Applets – it simulates an applet being notified by another object. For example, if you want to write an applet to process notifications from a particular button object, you could simulate this button being clicked in the Applet editor by setting the Parameter selection to the button object in question and running your applet. The Priority option in the Properties dialog for an applet tells Presentation Wizard how to schedule the execution of your applet when it displays a page with multiple things happening at once. If you enable Priority, everything else on your page will stop while your applet runs. If you disable Priority, your applet will run cooperatively with any other applets, animations, images and so on that are active at the time. You should enable Priority for short applets which handle notifications from other objects, as these must be processed quickly and typically only involve a few lines of applet programming – these "control" applets are typically not long enough to cause a noticeable delay in the other objects running on your page. You should disable Priority for longer applets which draw things or otherwise run for a meaningful amount of time. Keep in mind, however, that such applets may run very slowly if you have lots of other animated objects running on your page. By default, the background of an applet object as it will finally be displayed in a Presentation Wizard document page is transparent. This means that unless you have an applet draw something, it will be invisible. You can place applets that manage other objects but donÆt draw anything themselves wherever you like on a page – itÆs a good idea not to allow them to overlap other objects. Applet objects are displayed in the Presentation Wizard page editor with a textured background – this is just so you can see where they reside on your pages, and will not appear in your final pages.
Presentation WizardÆs Button objects will create conventional Windows clickable buttons in your pages. A button can be of any size you like – Presentation Wizard defaults to creating buttons with dimensions similar to those found in other Windows applications. You can add a Button object to a Presentation Wizard page by right-clicking anywhere on the background area. Select Insert from the menu which appears, and then Button from the Insert sub-menu. You can edit an existing Button object by double-clicking on it, or by right-clicking on it and selecting Edit from the menu which appears. See the section of this document which deals with the Page Editor for more about adding, deleting and editing objects. By default, Presentation Wizard adds four navigation buttons to each new page it creates. These can be deleted if you wish, or you can suppress their creation entirely. See the section of this document which deals with the Presentation Wizard Setup function for more about this. The Button editor includes the following fields: Title: The Title field of the Button editor defines the text which will appear in a Button object Left and Top: The Left and Top fields will allow you to define the location of the upper left corner of a Button object. Width and Depth: The Width and Depth fields will allow you to define the size of a Button object. Number: The Number field specifies the number of a Button object. Visible: The Visible option defines whether a Button object is visible – fairly obvious, this one. Default Button: Enable this field to make a Button object the default button for a page. The default button will be selected if a user of your presentation hits Enter. Enabled: Enable the Enabled item to create a button which is enabled and ready to accept clicks. Disable this item to create a disabled button – one which will presumably be enabled by a later notification. Action: The Action combo box in the Button editor defines what the button being edited will do when someone clicks on it. The options are: Do Nothing: Nothing will happen when the button is clicked. You might well ask why someone would want to click on a button that doesnÆt do anything. First Page: Jump to the first page of your presentation. Previous Page: Jump to the previous page of your presentation. Next Page: Jump to the next page of your presentation. Last Page: Jump to the last page of your presentation. Quit: End your presentation. Notify: Notify another object on the current page. The object to be notified can be specified using the target object combo box. Disable: Disable another object on the current page. The object to be disabled can be specified using the target object combo box. Jump to New Page: Jump to the page specified by the Target Page combo box. Show About Dialog: Display the About dialog for your presentation. The About dialog will display the About dialog text defined in the Header block for the current presentation. This is identical to what happens if someone selects About from the System menu of a presentation. Show Page Menu: Display a menu of all the pages in your presentation, allowing a user to jump to one of them. This is identical to what happens if someone selects Page Menu from the System menu of a presentation. Open Document: Attempt to open the document defined in the Document field.
Target Object: This field defines the page object to be notified or disabled if the button being edited is so configured. Target Page: This field defines the page to jump to if the button being edited is so configured. Document: This field defines the document to be opened if the button being edited is so configured. The document can be of any type for which there is an associated application on the machine that will be running your presentation. Common file types, such as WordPad DOC files, are a good choice. In fact, the most useful application for this field is to store web page URLs – in which case your presentations will boot up a web browser, fetch the page in question over the internet and display it.
You can have Button objects start sounds and animations, activate other objects and so on – see the discussion of Notification elsewhere in this document. Buttons which have been configured to use the four navigation actions – First, Previous, Next and Last – will be disabled on pages where they're inappropriate. Specifically, First and Previous buttons will be disabled if they find themselves on the first page of a presentation, and Next and Last buttons will be disabled if they find themselves on the last page of a presentation. Graphic Buttons In addition to conventional Windows text buttons, Presentation Wizard's pages can include user-created graphic buttons. A graphic button is an image which will be displayed in a Button object. Graphic buttons behave identically to conventional buttons, save for their appearance. They're clickable, and they can be configured to perform all the functions of conventional buttons. A button has two possible states – idle and depressed. Depressed buttons are not in need of therapy – this is the state a button is said to be in while it's being clicked on. In order to make a button object appear to be clicked, it's drawn to look recessed into the page it's part of. 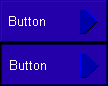
A graphic button's graphic consists of a single image which includes both an idle and depressed version of the button in question. An example is shown here. The upper half of the graphic is the idle button, and the lower half is the depressed button. Only one half will be visible at a time in a graphic button. You can create any visual effect you like in a graphic button's image, but it's important that you take care to draw the button with its two graphics arranged as is shown here. If your graphic button displays oddly, it will probably be as a result of your not having drawn the button graphic correctly. Note that if it's been created correctly, the vertical dimension of a button graphic will always be an even number, that is, it will be evenly divisible by two. Button graphics can be stored in any of the image file formats supported by Presentation Wizard. Storing button graphics as JPG files, however, is not recommended, as the JPG lossy compression will visibly degrade the appearance of your graphics. Each section of a button graphic must be no smaller than ten by ten pixels, and no larger than 256 by 128 pixels. To create realistic, professional buttons, plan on maximum dimensions somewhat smaller than this. The example button shown here displays as 108 by 43 pixels. To add a graphic Button object to a Presentation Wizard page:
When you select a graphic for use in a graphic Button object, the width and depth of the Button object will be adjusted automatically to the width and half the depth of the graphic you have selected. Graphic buttons do not display their Title text, as the button text and whatever else you want the button in question to display will be part of its graphic. It's a good idea to include title text in graphic buttons, however – preferably reflecting the title displayed as part of your graphic – such that other objects which reference your button will be able to show you a text name, rather than just an object number. You can edit the graphic in a graphic Button object by clicking on the Paint button in the Button dialog for the button in question. Note that if you change things like the text of the button, you'll need to perform the changes for both sections of the graphic. Disabled graphic buttons don't animate when they're clicked on – they also display in a disabled state. Presentation Wizard will generate the disabled version of a button from its idle button graphic and a colour which it uses to generate highlights and shadows. Inasmuch as Presentation Wizard can't work out a good choice for this colour, it requires that you provide it with a colour to use. Click on the Graphic Background colour button in the Button dialog to define this. Note that this colour is only used when a presentation displays disabled buttons – you can ignore it if your buttons won't be disabled. The graphic background colour can be anything you like – a fairly dark colour which matches the dominant colour of your button graphic would be a good choice. Graphic buttons offer designers of Presentation Wizard documents the opportunity to create individual, innovative pages – or, alternately, the possibility of writing something uniquely and unbearably ugly. Conventional Windows buttons, while visually uninteresting, are unmistakable in their functions. If you create graphic buttons, make sure they're not so un-button-like as to confuse the users of your presentations.
Presentation WizardÆs Checkbox objects will create conventional Windows check boxes. You can add a Checkbox object to a Presentation Wizard page by right-clicking anywhere on the background area. Select Insert from the menu which appears, and then Checkbox from the Insert sub-menu. You can edit an existing Checkbox object by double-clicking on it, or by right-clicking on it and selecting Edit from the menu which appears. See the section of this document which deals with the Page Editor for more about adding, deleting and editing objects. The Checkbox editor includes the following fields: Title: The Title field of the Checkbox editor defines the text which will appear in a Checkbox object Left and Top: The Left and Top fields will allow you to define the location of the upper left corner of a Checkbox object. Width and Depth: The Width and Depth fields will allow you to define the size of a Checkbox object. Number: The Number field specifies the number of a Checkbox object. Visible: The Visible option defines whether a Checkbox object is visible. Checked: If you enable the Checked field, your check box will be initially displayed checked. Enabled: Enable the Enabled item to create a check box which is enabled and ready to accept clicks. Disable this item to create a disabled check box – one which will presumably be enabled by a later notification. Notify: Enable this item to have the page object selected by the Target Object control notified when someone clicks in your check box. Target Object: This item selects the page object to be notified when someone clicks in your check box.
Closing Presentation Wizard Documents You can close the current document window in Presentation Wizard by selecting Close from the File menu. If the document file about to be closed has had changes wrought upon it since it was last saved, you will be prompted to save the changes. If you exit Presentation Wizard with one or more document windows still open, each one will be automatically closed. This process will also prompt you to save any changed document files.
If you'll be building Presentation Wizard documents to burn onto a CD-ROM, you can configure your CD-ROM to automatically run a presentation when it's inserted into a CD-ROM drive. A CD-ROM can be configured to automatically run an application written to it by including a file called AUTORUN.INF in the root directory of your CD-ROM. You can create an AUTORUN.INF file with the Windows NotePad text editor. Here's the text of a typical AUTORUN.INF file: [autorun] The OPEN= command tells Windows to run the executable PRESENT.EXE in the root directory of your CD-ROM. The argument to the OPEN command of an AUTORUN.INF file can also include a complete path to the executable to be run, for example: [autorun] You should not include a drive letter in the path, as it's impossible to know which drive your CD-ROM will find itself in on someone else's machine. Keep in mind that applications load a lot more slowly from a CD-ROM than from your hard drive. If you plan to build a large application to be started through an AUTORUN.INF file on a CD-ROM, you might want to have your AUTORUN.INF file start a small presentation which will in turn run the larger one through an OpenDocument call. This will permit your users to see something happening reasonably quickly once they insert your CD-ROM. An AUTORUN.INF can include a number of other commands. There's a complete list of them at Microsoft's web page on the subject.
Creating New Presentation Wizard Document Files To create a blank document file, select New from the File menu. A blank document file always includes a Header block. You can add page blocks to a new document file with the Insert function.
Copying, Cutting and Pasting Blocks You can cut or copy the current block of a Presentation Wizard document file to the Windows clipboard using the appropriate items of the Edit menu. The block copied or cut by the Copy and Cut menu items will always be the one with the insertion caret. Pasted blocks are always inserted after the block with the insertion caret.
You can delete any Page block from a document window. Click on the block in question to select it and click on the minus button in the tool bar, select Delete Block from the Edit menu or hit the Del key on your keyboard. Note that all the selected blocks in the uppermost document window will be deleted by the Delete function. The number of currently selected blocks is displayed in the status bar at the bottom of the Presentation Wizard application window. If you delete a page block and then change your mind, you can bring it back to life through the Undo function of the Edit menu. Undo only undoes the most recent change to a document window. By default, Presentation Wizard will warn you if youÆre about to delete more than one block.
Distribution of Presentation Wizard Documents If you're using a registered copy of Presentation Wizard, you're welcome to make all the presentations you can dream up, and to distribute them in any way you see fit. This includes uploading them to the Internet, giving them to friends, selling them, bundling them with other products or services or using them in conjunction with your business. You are not required to credit Alchemy Mindworks or Presentation Wizard. No royalties are payable for the Presentation Wizard runtime embedded in the presentations you create. You do not have to request our permission to use the presentations you create, no matter how unspeakably strange your intended use may be. If it's really, really strange, we'd probably rather not know what you have in mind. There is some fine-print information about Alchemy Mindworks and Presentation Wizard in the Setup dialog for every presentation created by this software, which may not be removed or modified. Alchemy Mindworks specifically prohibits the use of its name or its product names or trademarks in such a way that they might be construed as an endorsement or business agreement between you and Alchemy Mindworks. Users of your presentations will be bound by the license and distribution agreement terms posted at our web page. For the most part, this just disclaims responsibility for any problems which arise out of their use of your presentations. In short, should you make presentations with a registered copy of Presentation Wizard and become fabulously wealthy as a result, you don't owe us anything. Think of us if you fly over central Ontario in your private jet. If you're using an unregistered copy of Presentation Wizard, you are not authorized to distribute any presentations you create until such time as you register the software. Attempting to do so would be a very bad idea, as presentations created with an unregistered copy of the software will only run on the machine which created them. You can convert an unregistered presentation to a registered presentation as follows:
The document windows of Presentation Wizard Professional support drag and drop. Specifically, you can copy blocks between document windows in Presentation Wizard by dragging them. Items dragged to a Presentation Wizard document window will be inserted after the current position of the insertion caret.
Presentation Wizard Professional is not a drag source, and as such you cannot drag items from it to another application.
Presentation WizardÆs Edit objects will create conventional Windows text edit fields. You can add an Edit object to a Presentation Wizard page by right-clicking anywhere on the background area. Select Insert from the menu which appears, and then select Edit from the Insert sub-menu. You can edit an existing Edit object by double-clicking on it, or by right-clicking on it and selecting Edit from the menu which appears. See the section of this document which deals with the Page Editor for more about adding, deleting and editing objects. The Edit editor includes the following fields: Title: The Title field of the Edit editor defines the initial text which will appear in an Edit object. Left and Top: The Left and Top fields will allow you to define the location of the upper left corner of an Edit object. Width and Depth: The Width and Depth fields will allow you to define the size of an Edit object. Number: The Number field specifies the number of an Edit object. Visible: The Visible option defines whether an Edit object is visible. Enabled: Enable the Enabled item to create an edit field which is enabled and ready to accept text. Disable this item to create a disabled edit field – one which will presumably be enabled by a later notification. Notify: Enable this item to have the page object selected by the Target Object control notified when the text changes in your edit field. Use this feature carefully – it will typically generate a lot of notifications. Target Object: This item selects the page object to be notified when the text changes in your edit field. For practical purposes, Edit objects arenÆt of much use unless youÆll be writing an ANIMAL applet to deal with the text entered into them.
Fonts can be a contentious issue for Windows documents which migrate between machines – as Presentation Wizard's presentations are wont to do. Windows displays text based on the fonts it finds installed in the system it's running on. If the installed fonts on the machine that created your presentation differ from those of the machines on which it will be displayed, the Text objects in your presentation will appear with the wrong typefaces. This can look pretty strange, especially if Windows decides that the closest match for the font you used is a symbol face. Presentation Wizard offers three strategies for dealing with the fonts used to display Text objects. It's important to understand them if you're creating distributable presentation documents. Use common fonts: The most reliable and foolproof way to eliminate the potential problems caused by missing fonts is to avoid using any fonts which might go missing. All Windows systems are installed with a small group of common typefaces – Arial, Times New Roman and Courier New. If you restrict your use of fonts to these typefaces, you can safely assume that every Windows machine that will run your presentation will be able to supply it with the fonts the require. The catch in this is that Arial, Times New Roman and Courier New are pretty dull as typefaces go. Convert your Text objects to Static Image objects: Presentation Wizard includes a feature which will create Static Image objects from Text objects. This will, in effect, replace your text with a picture that looks just like your text. Being a picture, however, it will display correctly without having to resort to the fonts which created it. The catch in this is that Static Image objects are typically larger than the Text objects they're generated from, and once you convert a Text object to a Static Image object, its text will no longer be editable. Embed the fonts you need in your presentation: There's a switch in the Header block editor of Presentation Wizard called Embed Fonts. If you enable it, saving your presentation to disk will also save all the fonts used in it. The embedded fonts will be stored as part of your presentation's EXE file. When you run a presentation which has embedded fonts, the presentation will compare its list of embedded fonts to the fonts installed on the machine that's running it. If it finds any missing fonts – that is, fonts which it knows it will need, but which are not available – it will temporarily install them. When the presentation shuts down, the temporary fonts will be uninstalled. Font embedding sneaks around most of the foregoing issues, but it comes with a few catches of its own. Specifically:
Presentation WizardÆs Frame objects will create various rectangular frames. These can range from simple Windows-style frames to fairly complex graphic decorations. You can add a Frame object to a Presentation Wizard page by right-clicking anywhere on the background area. Select Insert from the menu which appears, and then Frame from the Insert sub-menu. You can edit an existing Frame object by double-clicking on it, or by right-clicking on it and selecting Edit from the menu which appears. See the section of this document which deals with the Page Editor for more about adding, deleting and editing objects. The Frame editor includes the following fields: Left and Top: The Left and Top fields will allow you to define the location of the upper left corner of a Frame object. Width and Depth: The Width and Depth fields will allow you to define the size of a Frame object. Number: The Number field specifies the number of a Frame object. This isnÆt likely to be of much use, as Frame objects canÆt be notified or operated on by any of the functions in the ANIMAL language. Thickness: This is the thickness of the line which surrounds a frame, for frame types which use it. Hollow: Enable this item to create a hollow frame. The width of the frame will be defined by the Thickness field. Angle: The angle field defines the gradient rotation angle for gradient frames. Colour Selectors: The colour selectors are used to define the colours with which your frame object will be drawn. They mean different things, depending on the frame type you choose. Each colour selector consists of a colour button and a combo box. The Custom option of a colour selector combo box will allow you to define a specific colour. The other options will use system colours defined in the colour scheme for each machine your presentation runs on. As the system colours are chosen by each Windows user, itÆs reasonable to assume that the users of your presentations wonÆt find your colour choises unspeakably ugly if you select system colours. The colour swatches in this combo box illustrate the system colours as they appear on your system. Frame types: The Type combo box in the Frame object editor will allow you to choose which frame type to draw for the Frame object being edited. HereÆs how they work: Simple: This is a simple frame drawn in the Primary colour. If itÆs not hollow, it will be filled with the Interior colour. The frame width will be determined by the Thickness control. Bevelled Out: This is a three-dimensional beveled frame drawn in the Primary colour for its highlight and the Secondary colour for its shadow. If itÆs not hollow, it will be filled with the Interior colour. The frame width will be determined by the Thickness control. For the most convincing results, the Primary colour should be somewhat lighter than the Interior colour, and the Secondary colour somewhat darker. Bevelled In: This is a three-dimensional beveled frame drawn in the Primary colour for its highlight and the Secondary colour for its shadow. If itÆs not hollow, it will be filled with the Interior colour. The frame width will be determined by the Thickness control. For the most convincing results, the Primary colour should be somewhat lighter than the Interior colour, and the Secondary colour somewhat darker. Windows Bump: This is a Windows-style bump frame. ItÆs drawn using system colours, and ignores all three colour selectors. Windows Etched: This is a Windows-style etched frame. ItÆs drawn using system colours, and ignores all three colour selectors. Windows Raised: This is a Windows-style raised frame. ItÆs drawn using system colours, and ignores all three colour selectors. Windows Sunken: This is a Windows-style sunken frame. ItÆs drawn using system colours, and ignores all three colour selectors. Gradient: This is a gradient frame drawn between the Primary and Secondary colours. The gradient will be rotated by the number of degrees set in the Angle field. Hollow gradient frames can be really useful in creating the appearance of light and shadow in a well-designed page.
Hardware and Software Requirements Presentation Wizard Professional requires a Pentium or better processor to run. If you attempt to run it on a system with an 80386 or 80486 processor, it may refuse to boot. A minimum of 64 megabytes of memory are required to run Presentation Wizard reliably, with 128 megabytes strongly recommended. Its performance will improve with increased memory. Note that if you run Presentation Wizard on a system with numerous other large applications running concurrently – such that much of your system's memory is in use by other software – its performance may be degraded. Attempting to run large or complex presentations created by Presentation Wizard on systems with relatively little available memory can cause your presentations to misbehave as well. Presentation Wizard can be used on systems with 256-colour Windows screen drivers, but doing so will typically not allow you to view some presentations with their correct colours. Presentation Wizard will perform some functions noticeably slower on such systems. A high-colour or true-colour Windows screen driver is strongly recommended. See the Drivers document for a complete discussion of screen drivers and how to correctly configure yours. If you have a system with a sixteen-colour Windows screen driver installed, do not attempt to run Presentation Wizard Professional on it. Presentation Wizard Professional may become so horrified by sixteen-colour Windows screen drivers as to run screaming from the room and require eleven to fifteen weeks of intense therapy and post-traumatic counseling. You have been warned. Presentation Wizard Professional occupies approximately eight megabytes of hard drive space – you can recover about three megabytes by deleting all the help, documentation and example files. This is not recommended unless you store them elsewhere or you have a breathtaking understanding of the software before you do so. You can run Presentation Wizard professional under Windows 95, Windows 98, Windows ME, Windows 2000 and Windows NT 4.0 or better. It has not been tested under Windows NT 3.51 and it will not run under Windows 3.1 or Windows 3.11 with WIN32S even if you ask it really, really nicely. Presentation Wizard Professional does not require any other specific software to be installed, with the exception of the Paint application which comes with Windows.
Every presentation created by Presentation Wizard has a header block as the first block in its list. You can edit the Header block by double-clicking on it. The Header block editor provides access to the following items: Background: The background control group defines the default background for your presentation. The default background will apply to all the pages in your presentation, although each page has the option of overriding it. HereÆs what each of these controls do: Background Combo: This selects a solid background colour for each page of your presentation. The Custom option will allow you to define a specific colour. The other options will use system colours defined in the colour scheme for each machine your presentation runs on. As the system colours are chosen by each Windows user, itÆs reasonable to assume that the users of your presentations wonÆt find your colour choises unspeakably ugly if you select system colours. The colour swatches in this combo box illustrate the system colours as they appear on your system. Solid: Select the Solid option if you want a solid colour background, as opposed to a picture for a background. Background Colour Button: The background colour button will allow you select a specific background colour if you have the Background combo box set to Custom. Picture: Select the Picture option if you want your page backgrounds to display a picture. Select: The Select button to the right of the Picture radio button will allow you to choose a source image for your default page backgrounds. You can import the same image types as are supported by the Image page object as discussed elsewhere in this document. Note that your selected image will become part of your Presentation Wizard document once it has been imported. Tiled: The Tiled option will cause your selected picture to be tiled across the background of your Presentation Wizard pages. If Tiled is not enabled, a single image will be displayed in the center of each page. Drawn: The Drawn item tells Presentation Wizard to remap rather than dither your background picture if it finds itself confronted with a 256-colour display adapter. See the Introduction to Graphic Files document installed with this application for more about this. The Drawn setting is ignored on machines which can display more than 256 colours. Password Protect on Open: Enable this item to password protect your presentation files. Password-protected presentations will display correctly, but they cannot be opened in Presentation Wizard without the password you assign to them. This will prevent other users from opening and modifying your presentations. Password: Enter a password in this field if Password Protect on Open is enabled. Attributes: The Attributes group will allow you to define the dimensions of your Presentation Wizard document window, and to enable options in the window style: Width and Depth: These values define the exterior dimensions of your presentation window in pixels. The actual useable area of your window may be smaller, allowing for the window borders, caption and so on. Caption: Enable this option to have a title bar in your window. Note that the System Menu, Minimize and Maximize options will be ignored if the Caption option is not enabled. System Menu: Enable this option to have a small application icon and a system menu available at the left edge of the title bar for your presentation window. Resizable: Enable this option if you want to have your presentation display in a resizable window. In most cases, this is a really bad idea, as it will allow users of your presentations to select window dimensions you hadnÆt planned on. Minimize: Enable this option to have an active minimize box displayed at the right edge of the title bar for your presentation. Maximize: Enable this option to have an active maximize box displayed at the right edge of the title bar for your presentation. This is usually a really bad idea too, for the same reasons as the Resizable option is. Fixed Client Size: Enable this option to have the Width and Depth fields define the size of your pages, in pixels. Disable it to have the Width and Depth fields define the size of the window in which your pages will be displayed. In the latter case, your pages will be somewhat smaller than the size defined by Width and Depth, as your window will include borders and optionally a caption bar. Embed Fonts: Enable this option to have the fonts you use in Text objects embedded in your presentation. See the discussion of fonts and font embedding for more about this feature. Show Status: Enable this option to have your presentations display a status window with a progress bar as they're loading. This is recommended for large presentations, or for presentations destined for CD-ROMs. Preview: The Preview button will show you a sample of the presentation window you have defined, with the background you have selected.. Title: This text will be displayed in the title bar of your presentation. About Dialog Text: Text entered into this field will appear in the About dialog for your presentation. You can enter up to 1024 characters in this field. This is a good place to put copyright information about your presentation, and other credits and details. The About dialog can be accessed through the System menu of a presentation, or through a suitably-configured Button object. The Header block editor displays several bits of information about your presentation, including who created them. Note that in a password-protected presentation, this information will not be accessible, as no one else will be able to open your presentation document file.
A Presentation Wizard page can include graphics as Image and Static Image objects. Graphics can also be displayed from within Applets, which are discussed elsewhere in this document. Image objects allow for images which transition in and out of your pages with a selection of animated effects. Static Image objects do not allow for transitions, but they do support transparency. See the discussion of Static Image objects elsewhere in this document for more information. The images for Image objects are imported from image files. Presentation Wizard will import images from JPEG, BMP, PCX, TGA and PNG files. In answer to the obvious question, Presentation Wizard will not import files in the GIF format, nor is it likely to in the future. GIF is an antiquated format with poor image quality and some legal issues. If you have source images in the GIF format which you wish to import into a Presentation Wizard document, we recommend that you use our Graphic Workshop Professional software to convert your pictures to a supported format, such as PNG or BMP. The Image editor includes the following fields: Left and Top: The Left and Top fields will allow you to define the location of the upper left corner of an Image object. Width and Depth: The Width and Depth fields will allow you to define the size of an Image object. Number: The Number field specifies the number of an Image object. Visible: The Visible option defines whether an Image object is visible. Drawn: The Drawn item tells Presentation Wizard to remap rather than dither your image if it finds itself confronted with a 256-colour display adapter. See the Introduction to Graphic Files document installed with this application for more about this. The Drawn setting is ignored on machines which can display more than 256 colours. Paint: Click on the Paint button to open your image in a Paint window for editing. As noted earlier in this section, Image objects under Presentation Wizard can display still images, and they can display them with animated transitions. Animated transitions can be used to make your graphics wipe in and out, appear as a sequence of tiles, split and otherwise jump around a bit. The image in an Image object is displayed in three sequential processes – it transitions in, waits for a while and then transitions out. You can select a transition that doesn't do anything to make an image appear and disappear with no fanfare. The following are the available effects for transitions: None: No animation – your picture will appear, wait for a while and then vanish. Chaos and Order: Your picture will appear as a mosaic of random tiles which will gradually arrange themselves correctly. This effect does not have a corresponding transition out. Horizontal Split: Your picture will split horizontally. No Clear: Your picture will appear, but will not be erased from the screen when its display time has elapsed. Plummet: Your picture will appear as a sequence of vertical stripes, which will drop into the image area. Quadrants: Your picture will animate into the image area as four sections. This effect does not have a corresponding transition out. Random Effect: One of the other effects will be chosen at random. Sandstorm: Your picture will appear as a cloud of pixels. Tile: Your picture will appear as a mosaic of tiles. Vertical Split: Your picture will split vertically. Wipe in from Left: Your picture will wipe in from the left. That was pretty obviousà Wipe in from Right. Your picture will wipe in from the right. The Effect control group in the Image block editor controls the image transitions. The Transition In combo box selects the transition that precedes your image, and the Transition Out combo box selects the transition that follows your image. Other controls include: Speed: The speed of the animation of your transitions. Pause: The number of seconds your image will remain motionless between transitions. Loop: If the Loop item is enabled, your Image object will transition in and out repeatedly. If itÆs not enabled, it will transition once and then stop.
The Left and Top fields will allow you to numerically position the upper left corner of your Image object. The Width and Depth fields will be set by the pixel dimensions of your image. ItÆs usually a breathtakingly bad idea to allow an Image object to overlap another object on your page. See the discussion of Notification elsewhere in this document for more about the Notify and Target Object items in the Image dialog. The Preview button will allow you to see your image, with its transitions, as it will appear in your completed presentation. If the Loop item is not selected in the Image object editor dialog, the Preview window will automatically close when the image has transitioned once. You can close the Preview window by right-clicking in it. The Paint button will open your image in a paint window, allowing you to edit it. By default, this will be Windows Paint. When you exit the paint window, your modified image will be replaced in your Image object. See the discussion of Paint Applications, elsewhere in this document, for more about the Paint function. Note that the Paint function will change the image in your presentation – it will not affect the source image file from which it was imported. Once you import a picture into a Presentation Wizard document, it will become part of your final EXE file. It is not necessary to include your original graphic files with your presentations when you distribute them.
You can insert as many Page blocks as you like into a presentation. To insert a Page block, click on the Insert button – the green plus sign in the tool bar – or select Insert from the Edit menu. Your new Page block will appear immediately after the currently selected block, the one with the insertion cursor under it.
Presentation WizardÆs List Box objects will create conventional Windows list boxes. Presentation WizardÆs list boxes only allow for a single item at a time to be selected. You can add a List Box object to a Presentation Wizard page by right-clicking anywhere on the background area. Select Insert from the menu which appears, and then List Box from the Insert sub-menu. You can edit an existing List Box object by double-clicking on it, or by right-clicking on it and selecting Edit from the menu which appears. See the section of this document which deals with the Page Editor for more about adding, deleting and editing objects. The List Box editor includes the following fields: Left and Top: The Left and Top fields will allow you to define the location of the upper left corner of a List Box object. Width and Depth: The Width and Depth fields will allow you to define the size of a List Box object. Number: The Number field specifies the number of a List Box object. Visible: The Visible option defines whether a List Box object is visible. Enabled: Enable the Enabled item to create a list box which is enabled and ready to accept clicks. Disable this item to create a disabled list box – one which will presumably be enabled by a later notification. Notify: Enable this item to have the page object selected by the Target Object control notified when someone clicks in your list box. Target Object: This item selects the page object to be notified when someone clicks in your list box. Sort: Enable this item to have the items in your list box displayed in alphabetical order. Disable this item to have the items in your list box displayed in the order in which they were added. Add: Click on the Add button to add a new entry to the List Box object being edited. The new entry will be added before the currently selected entry. Remove: Click on the Remove button to remove the currently selected entry from the List Box object being edited. You can edit the text of an entry in the List Box editor by double-clicking on it.
Presentation WizardÆs MIDI objects contain music imported from MIDI files. You can add a MIDI object to a Presentation Wizard page by right-clicking anywhere on the background area. Select Insert from the menu which appears, and then MIDI from the Insert sub-menu. You can edit an existing MIDI object by double-clicking on it, or by right-clicking on it and selecting Edit from the menu which appears. See the section of this document which deals with the Page Editor for more about adding, deleting and editing objects. Note that MIDI objects appear as icons in the Presentation Wizard page editor. They will be invisible in your final pages. The MIDI editor includes the following fields: Left and Top: The Left and Top fields will allow you to define the location of the upper left corner of a MIDI object. Number: The Number field specifies the number of a MIDI object. Visible: The Visible option defines whether a MIDI object is visible – fairly obvious, this one. Enabled: Enable the Enabled item to create a MIDI object which begins playing as soon as the page it appears in is displayed. Disable this item to create a disabled MIDI object – one which will presumably be enabled by a later notification. Notify: Enable this item to have the page object selected by the Target Object control notified when the MIDI object in question finishes. Target Object: This item selects the page object to be notified when the MIDI object in question finishes. Preview: Click on this button to hear the music stored in the MIDI object being edited.
Opening and Saving Presentation Files Presentation WizardÆs presentation documents are stored in files having the EXE extension. This extension tells Windows that your presentations are executable Windows applications, and that they donÆt require an additional viewer or run-time module to execute. Note, however, that all other Windows applications have the EXE file extension too, and these have nothing to do with Presentation Wizard. Presentation Wizard will not open EXE files other than the ones it creates. This includes PRSPRO.EXE, which is in fact Presentation Wizard itself.
The Save and Save As functions of the File menu will save your current presentation file to disk. If you save a presentation file with an unregistered copy of Presentation Wizard, the presentation will have the following characteristics:
Should you create a presentation while you're evaluating an unregistered copy of Presentation Wizard and subsequently register the software, simply open your presentation with your registered copy of the software and save it again. This will remove all the unregistered presentation restrictions. See the section of this document which deals with the distribution of presentations for more about this. It is strongly recommended that you save the presentations you plan to distribute with password protection enabled, as discussed in the Header section of this document.
The facility of having Presentation WizardÆs page objects notify each other is extremely powerful. If you use it correctly, it will allow you to create complex, dynamic pages, often without any resource to writing applets. A notification is a message sent from one page object to another, which typically says "wake up." The various objects respond differently to notifications. For example, you could have a Button object configured to tell a previously invisible Image object to begin its transition when someone clicked on the button. Most objects can both send and receive notifications. HereÆs how this works: Sending: An animation object can send a notification to any other object when it has completed playing. Note that looping animations donÆt end until their loops expire, and which time they can notify another object. An animation with an infinite loop will never end, and as such will never notify another object. Receiving: An animation object which has previously been disabled – such that itÆs invisible – will begin playing if it receives a notification from another object. Sending: An Applet object can send notifications through its EnableObject function. An applet can call EnableObject more than once for different page objects, allowing one applet to notify multiple objects. Receiving: If a previously disabled applet receives a notification, it will begin running. The number and type of the object which notified it can be retrieved by the applet, as discussed in the Animal Language Reference document installed with this software. Sending: A Button object can be configured to send a notification to any other object when the button is clicked. Receiving: A Button object which has previously been disabled – such that it appears grey and canÆt be clicked on – will be enabled if it receives a notification from another object. Sending: A Checkbox object can be configured to send a notification to any other object when itÆs clicked. Receiving: A Checkbox object which has previously been disabled – such that it appears grey and canÆt be clicked on – will be enabled if it receives a notification from another object. Edit: Sending: An Edit object can be configured to send a notification to any other object when the text in its edit field is changed. Use this one carefully – it can generate a lot of notifications. Receiving: An Edit object which has previously been disabled – such that it appears grey and canÆt be clicked on – will be enabled if it receives a notification from another object. Sending: Frame objects canÆt send notifications. Receiving: Frame objects canÆt receive notifications. Sending: An Image object can send a notification to any other object when it has completed its transition in and out. Its Loop item must be disabled. Receiving: An Image object which has previously been disabled – such that itÆs invisible – will begin its transition if it receives a notification from another object. Sending: A List Box object can be configured to send a notification to any other object when the selected item is changed. Receiving: A List Box object which has previously been disabled – such that it appears grey and canÆt be clicked on – will be enabled if it receives a notification from another object. MIDI: Sending: A MIDI object can send a notification to any other object when it has completed playing. Receiving: A MIDI object which has previously been disabled – such that itÆs silent – will begin playing if it receives a notification from another object. Sending: A Radio Button object can be configured to send a notification to any other object when itÆs clicked. Receiving: A Radio Button object which has previously been disabled – such that it appears grey and canÆt be clicked on – will be enabled if it receives a notification from another object. Sending: Static image objects canÆt send notifications. Receiving: Static image objects canÆt receive notifications. Text: Sending: Text objects canÆt send notifications. Receiving: Text objects canÆt receive notifications. Sending: A Timer object can be configured to send a notification to any other object when its time expires. Receiving: A Timer will begin timing when it receives a notification. Wave: Sending: A Wave object can send a notification to any other object when it has completed playing. Receiving: A Wave object which has previously been disabled – such that itÆs silent – will begin playing if it receives a notification from another object. Only an object which is currently disabled can receive notifications – if you send a notification to an enabled object, the notification will be ignored. For example, if you notify Wave object which is in the middle of playing, nothing will happen and the Wave object will carry on playing. You can be fairly imaginative in stringing objects together through notifications. For example, you could:
Notifications must be sent to a specific object. The editor dialogs for each of the object types which know how to send notifications include combo boxes entitled Target Object. Use the Target Object combos to select the object to be notified. Keep in mind that itÆs up to you to make sure that you have selected the right object, that the object you have selected can receive your notification and that it will be disabled and as such ready to be notified at such time as your notification is sent. All the object types supported by Presentation Wizard which can receive notifications include check boxes in the object editor dialogs entitled Enabled. If you select the Enabled option, your object will receive a notification as soon as your page appears. If you donÆt, it will be disabled and will await notification from another object. If you wish to have an object notify more than one other object, youÆll need to write a trivial applet to receive the notification from your first object and call EnableObject for each of the multiple objects you want to notify.
In theory, all objects in a presentation are managed as windows. In practice, this approach runs into some problems with Windows' slightly warped internals. To this end, Presentation Manager actually cheats a bit, and handles certain types of objects as "static." A static object is one which appears in a presentation, but is never called upon to move, change, be clickable or otherwise do anything other than show up and be visible. This doesn't make much difference to the appearance of static objects in a presentation, but it does mean that they'll ignore notification messages sent to them, and they can't be rendered visible or invisible. Presentation Manager's Static Image and Frame objects are always treated as static. Text objects are treated as static if they're defined with transparent backgrounds.
You can edit any Page block in a Presentation Wizard presentation by double-clicking on it. Doing so will open a page editor window for your page. The page editor will display your page more or less as it will appear when your presentation is actually running, and allow you to add, delete and manipulate the page objects therein. In fact, there are several object types, such as Wave sounds, Applets and Timers, which are by their nature invisible. The page editor will represent these with icons or other graphics so youÆll know where they are. These objects will not be seen in your final pages. You can access the page editorÆs menu by right-clicking anywhere in its window where there is no page object. Hold down the Shift key and right-click to access the page editor menu if your cursor is over an existing object. HereÆs what the menu items do: Undo: Select undo to reverse the most recent change youÆve applied to the page being edited. Note that the Undo function only undoes the most recent action. If thereÆs nothing to undo, the Undo item will be disabled. Close: Select Close to save the changes to your page and close the page editor window. Abandon: Select Abandon to abandon the changes to your page and close the page editor window. Properties: Select Properties to open the page Properties dialog, as discussed below. Paste: Select Paste to paste an object previously copied to the clipboard back to your page. The pasted object will appear slightly offset from its original location – to the right and below the original, if thereÆs room. If the object from which it was originally copied is present on the page being edited, the pasted object will be assigned a new object number. Set Grid: Configure the grid parameters. See the discussion of the positioning grid below. Snap to Grid: Toggle the positioning grid on or off. You can do this through the Set Grid function as well – the Snap to Grid menu item is quicker. Help: Open the Help window for the page editor. Insert: Select Insert to add a new page object. The Insert sub-menu lists all the available object types. The page object types are discussed in detail in their own sections of this document.
Page objects – Buttons, Images, Animations and so on – can be positioned interactively in the page editor window by clicking and dragging within the object. When your mouse cursor is correctly positioned to drag an object, the cursor will look like a hand. You can also position objects numerically by changing the Left and Top fields in their respective editors. Some object types, such as Buttons and Frames, can be interactively resized as well. Position your mouse cursor over the edge of a resizable object and click and drag it. When your mouse cursor is correctly positioned to resize an object, the cursor will look like an arrow. You can also resize objects numerically by changing the Width and Depth fields in their respective editors. If an object canÆt be resized, the arrow cursor will not appear and the Width and Depth fields in its editor wonÆt be editable. Note that Image, Static Image and Animation objects are not resizable – their dimensions are determined by the graphics imported into them. You can open the editor dialog for a page object by double-clicking on the object. You can open the object menu for a page object by right-clicking on the object. HereÆs what the object menu items do: Edit: The Edit item will open the editor dialog for a page object. This is equivalent to double-clicking on an object. Delete: The Delete item will remove an object from the page being edited. Duplicate: The Duplicate item will duplicate the selected object. The duplicated object will appear slightly offset from its original location – to the right and below the original, if thereÆs room. It will be assigned a new object number. Cut: The Cut item will cut the selected object to the Windows clipboard. Copy: The Copy item will copy the selected object to the Windows clipboard. Order: The Order item will open the Order sub-menu, which will allow you to adjust the order of the selected object relative to the other objects on your page. The order of objects determines the order in which theyÆre drawn, and as such, which objects are uppermost and visible if objects overlap. The rearmost objects are drawn first, and as such will be obscured by later objects that appear over them. For the most part, the only instance in which one object should overlap another is when objects are placed within a frame. The Set Grid item of the page editor menu enables the positioning grid. When the grid is active, objects which are inserted or dragged on a page will snap to the nearest grid point. You can configure the grid to be visible or invisible through the Set Grid dialog. The grid can be turned on or off either through the Set Grid dialog or the Snap to Grid item of the page editor menu. The Page Properties dialog, accessible through the page editorÆs right-click menu, will allow you to set the title and an optional custom background for your page. By default, all the pages in a Presentation Wizard presentation will display the background characteristics defined by the presentation's header block. This is either a great way to ensure a visually consistent look and feel to your work or a really boring image, depending on whether you feel that consistency is the hallmark of organization or the hobgoblin of small minds. To this end, you can override the Header block page background definition with a unique background for any page you like. Background: The Background control group in the Page Properties dialog defines how the background for your page should look. If you set the Background combo box to Header, your page will display the background defined by the Header block for your presentation. All the other options in the Background combo box will override the Header background definition and create a unique background for the page being edited. HereÆs what each of these controls do: Background Combo: This selects a solid background colour for each page of your presentation. The Custom option will allow you to define a specific colour. The other options will use system colours defined in the colour scheme for each machine your presentation runs on. As the system colours are chosen by each Windows user, itÆs reasonable to assume that the users of your presentations wonÆt find your colour choises unspeakably ugly if you select system colours. The colour swatches in this combo box illustrate the system colours as they appear on your system. Solid: Select the Solid option if you want a solid colour background, as opposed to a picture for a background. Background Colour Button: The background colour button will allow you select a specific background colour if you have the Background combo box set to Custom. Picture: Select the Picture option if you want a picture for your page background. Select: The Select button to the right of the Picture radio button will allow you to choose a source image for your page background. You can import the same image types as are supported by the Image page object, discussed elsewhere in this document. Note that your selected image will become part of your Presentation Wizard document once it has been imported. Tiled: The Tiled option will cause your selected picture to be tiled across the background of the page being edited. If Tiled is not enabled, a single image will be displayed in the center of your page. Drawn: The Drawn item tells Presentation Wizard to remap rather than dither your background picture if it finds itself confronted with a 256-colour display adapter. See the Introduction to Graphic Files document installed with this application for more about this. The Drawn setting is ignored on machines which can display more than 256 colours. Title: This field defines the local title for your page. It will be appended to the title set in the Header block and used in the title bar for your presentation.
The Image, Static Image and Applet object editors include Paint functions. The Paint functions will allow you to edit the images imported into Presentation Wizard documents. In fact, what they actually do is to save your image to a temporary BMP file, open the BMP file in a paint application, wait for the Paint application to terminate and then replace the image in question with the one in the temporary BMP file. We too were amazed that this actually works. By default, the Paint functions call Windows Paint, the low-rent paint application that's installed with Windows. The Windows Paint application is arguably a good example of the assertion that free software is pretty much worth what it costs. If you have a better paint package installed on your system and you wish to have Presentation Wizard's Paint function call it rather than Windows Paint, you can arrange this by editing the PRSPRO.INI file in your \WINDOWS directory.
To change the paint software for Presentation Wizard, do the following:
Suitable alternate paint software for Presentation Wizard's Paint function must be able to read and write graphics in the BMP format, and open files passed as command-line parameters. Pretty well all the popular image editing packages can do this. For the most part, we will be unable to help you sort out problems with alternate paint software. Should you wish to return Presentation Wizard to its default Paint configuration, repeat the foregoing steps using MSPAINT.EXE for the PaintbrushName item. If you have both Windows 95, 98 or ME and Windows NT or 2000 installed on your computer as a dual-boot system, it's possible that Presentation Wizard may find MSPAINT.EXE for the wrong version of Windows. Should this happen, Windows will complain about not being able to find several required libraries when you use the Paint function. In this case, you must edit PRSPRO.INI, as discussed above, and set the PaintbrushPath item to point to the correct copy of Windows Paint. By default, Presentation Wizard will ensure that it has a paint application available every time it runs. If it doesn't find one, it will open the Search for Paintbrush dialog and look for one. In the event that there actually is no paint application installed on your system and you don't need the Paint function, you can prevent it from doing this by disabling the Search for Paintbrush item in the Setup dialog.
Palettes under Windows are a can of worms so large and so wormy that upon opening it, only a can of significantly greater dimensions and the finest stainless steel can be used to satisfactorily re-can all the worms. This section will touch on the problem to the extent that is necessary to create presentations – there are probably a few books available that discuss it in much greater detail. Most contemporary Windows computers are equipped with display cards capable of displaying in excess of 256 colours. The next step up from 256 colours is, in fact, 32,768 colours, a fairly broad step. A screen which can display 32,768 or more colours can effectively display pictures in all the colours they were born with, however many colours that may be. Moreover, it can display multiple such pictures at the same time, again with a breathtaking lack of colour restrictions. Having said this, some such computers, while capable of displaying in excess of 256 colours, are shipped with 256-colour screen drivers installed in them. This, in effect, turns them into colour vegetables until their owners reconfigure them. As is discussed in the screen driver document installed with this software, reconfiguring the screen driver of a Windows 95, 98, ME, 2000 or NT system is less complicated than the operating instructions for most brands of soap. None the less, a surprising number of Windows users don't know that this facility is available, or just never get around to using it. Both for this reason and because a significant number of antique garage-sale systems with older display cards are still bobbing precariously in the oil-soaked waters of technology, it's worth keeping in mind that your presentations might be asked to run on systems which are capable of displaying fewer colours than you had in mind. A computer with a 256-colour display driver installed can only display 256 unique colours at one time. Because Windows requires some of those colours to display things like dialog boxes, scroll bars and your desktop, for practical purposes only 236 colours are actually available to applications running on these hoary old monsters. 256 colours really aren't sufficient to display photorealistic images such that they look photorealistic. It's possible to cheat around this, however, by dithering photorealistic images to 256 colours. This is discussed in detail in the Introduction to Graphic Files document installed with this software. Should the foregoing paragraph have sounded a bit like two atomic bomb scientists reminiscing about the golden age of particle physics, you might want to read Introduction to Graphic Files before you proceed. While dithering works reasonably well on photorealistic images, it results in fuzzy-looking lines and other objects if it's applied to text and other mechanical art. Such drawn images should be remapped, rather than dithered. There's no way for Presentation Wizard to know whether an image is photorealistic or drawn, however, and for this reason it includes options to allow you to tell it how to handle each picture in a presentation, should the presentation in question find itself on a machine with a 256-colour screen driver. Because a presentation created by Presentation Wizard might find itself called upon to display more than one image at a time, all dithering and remapping is done using a common 256-colour palette. This palette consists of an even dispersal of colours from black to white. The issue of palettes and presentations can be of as much or as little concern as you want it to be. Specifically, you can handle it in one of the following ways: Ignore it: It might well be argued that people with 256-colour screen drivers in their computers are used to looking at ugly graphics, and seeing a few more in your presentations won't trouble them unduly. Each passing day sees fewer such machines still running. Left to their own devices, Presentation Wizard's presentations will dither or remap their images reasonably well, should they find themselves in cramped quarters. Use Multiple Image Sets: This is the really sophisticated way to handle the palette issue. It's only applicable to images displayed by applets, or if youÆre fairly sneaky, controlled by them. Create two images for every graphic to be displayed – one for systems with screen drivers capable of displaying more than 256 colours, and one for systems that can't. Fine-tune the latter to look their best using the standard 256-colour palette supported by Presentation Wizard. This is identical to the 256-Colour Orthogonal Palette in the Effects function of our Graphic Workshop Professional application, and the 256-Colour palette of GIF Construction Set Professional. Use the GetScreenBits function of the ANIMAL language to decide which one to display. While elegant and sophisticated, this latter approach is a lot more work, and will increase the size of your presentations considerably if you use a lot of graphics. Because none of the foregoing means anything at all on a system with a screen driver capable of displaying more than 256 colours, it's arguably not really worth worrying about. Unless you are building a presentation which you know will be run on older equipment and you're very particular about how the images look, you can probably get away with setting the Drawn flags appropriately in the relevant Presentation Wizard editors and in applets which use the DrawPicture function, and let the pixels fall where they may.
The Photo Album Wizard function in the File menu of Presentation Wizard will create photograph albums and other presentation which require a large number of graphics, with one image per page. It can save a great deal of pointing and clicking. As with presentations build by hand, Photo Album Wizard's work will be fully editable Presentation Wizard documents. As such, keep in mind that you can manually fine tune its pages if you want to change specific elements it installs. This includes things like the colours it chooses, the text of image captions and the design of its cover pages. Photo Album Wizard will create a presentation with as many images as you select, subject only to the bounds of good taste and available disk space. Having said this, keep in mind that potting your entire collection of over twelve thousand images of historical saxophones in an electronic photograph album may result in a very large, unwieldy file. You have been warned. When you turn the Photo Album Wizard feature loose on your pictures, you'll have be able to select a cover design – or no cover at all, if you feel that your pictures require no introduction – and then add pictures from files in any of the formats supported by Presentation Wizard. The pictures imported by the Photo Album Wizard will be stored as Static Image objects. You can also have Photo Album Wizard add an optional Timer object to each of its pages, so they'll turn themselves if you like. It's important to keep in mind that Photo Album Wizard defaults to using reasonably attractive settings. If you're in a frothing hurry and you aren't up for reading the rest of this section, just keep clicking on Photo Album Wizard's Next button. To activate Photo Album Wizard, select Photo Album Wizard from the File menu of Presentation Wizard. Here's what each of the panels of the wizard do: 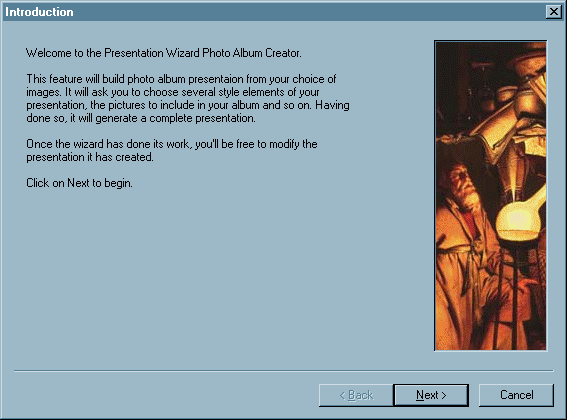 Introduction: This one doesn't do much of anything, but the wizard had to start somewhere. The graphic is a fragment from the painting The Alchemist, by Joseph Wright (1734 – 1797). 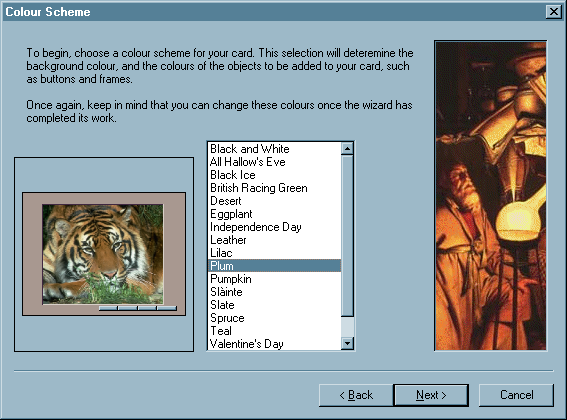 Colour Scheme: This panel will allow you to select the colour scheme that Photo Album Wizard will use for its text, frames and other objects when it finally builds your presentation. Keep in mind that you can change these colours once it's done. You'll also probably spot some wildlife herein – the tiger is an example graphic used in the Photo Album Wizard preview window. It will be replaced by your own choice of pictures shortly. 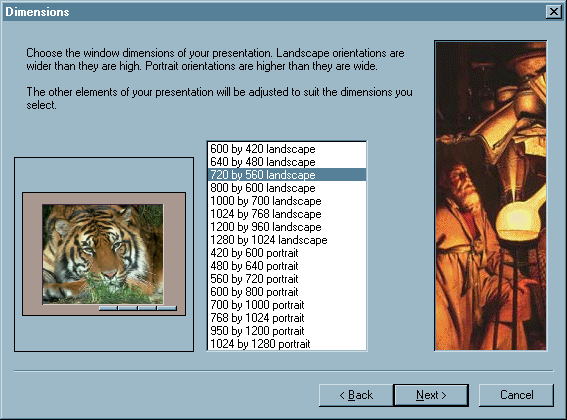 Dimensions: This panel will let you select the window dimensions for your presentation. These values are actually the client area sizes for the presentation you're about to create, that is, the area where your pictures will reside, excluding the borders and title bar. Choose a dimension set which will be smaller than the monitor area of the intended recipients of your presentation. The default, 720 by 560 pixels, is a good choice, as it will create a presentation that fits on an 800 by 600 monitor. Select the larger dimension options at your peril. 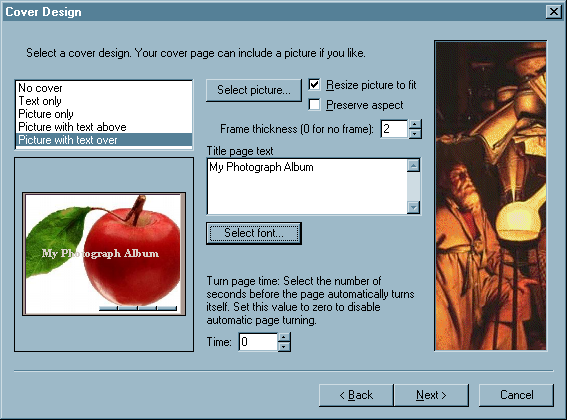 Cover Design:This panel will allow you to choose the design elements for the cover of your presentation. These include: Cover Type: The cover type selector, in the upper left corner of the panel, will define the general layout of your cover. Select Picture: Click on this button to choose a cover graphic to replace the tiger – huge carnivorous predators can become tiresome after a while. There's a discussion of the file formats supported by Presentation Wizard in the section on Image objects elsewhere in this document. Resize Picture To Fit: Enable this option to have Photo Album Wizard adjust the size of your cover graphic to fill the available space. There's a discussion of the image resizing options available in Photo Album Wizard below. Preserve Aspect: Disable this option to tell Photo Album Wizard to crop your picture to fill the entire image area of the cover page, if the Resize Picture to Fit option has been enabled. Enable it to keep your entire image visible. Frame Thickness: If this value is set to something larger than zero, a beveled frame around your cover picture will be added to the cover page of your presentation. Title Page Text: Enter the text you wish to appear on your title page. Text will only by added to the title page of your presentation if you have selected a cover type, above, which supports text. Select Font: Click on this button to choose the typeface, size and style for your cover text. Turn Page Time: If you set this value to something larger than zero, a Timer object will be added to your cover page to turn the page automatically after the specified number of seconds. Users of your presentation will still be able to turn the page manually if they don't want to wait for the timer. 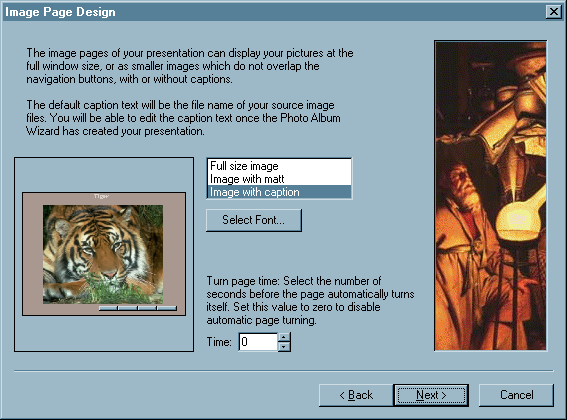 Image Page Design: This panel will let you select the elements for the remaining pages of your presentation, the ones that will display your photographs. These options include: Inside Page Type: The inside page type selector, in the upper center area of the panel, will define the general layout of your inside pages. Full Size Image will allow your graphics to extend to cover almost the entire page area, running under the navigation buttons. Image With Matt will confine your images to an area within the navigation buttons. Image With Caption works like Image With Matt, but it adds a caption above your images. The caption will be set to the file name of each of the graphics in your presentation – you can edit the captions after Photo Album Wizard has completed its work. Select Font: Click on this button to choose the typeface, size and style for your inside page caption text. Turn Page Time: If you set this value to something larger than zero, a Timer object will be added to each of your inside pages to turn the pages automatically after the specified number of seconds. Users of your presentation will still be able to turn the pages manually if they don't want to wait for the timers. 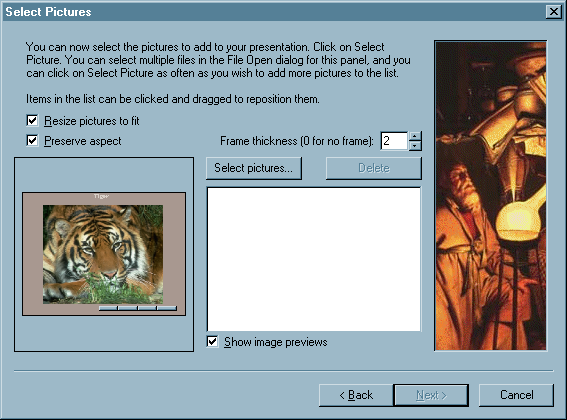 Items in the file list can be clicked and dragged to change the order in which they appear. Select an item and click on Delete to remove it from the list. Double-click on an item to open a preview window for its image and display its image dimensions and colour depth. Other options in this panel include: Resize Picture To Fit: Enable this option to have the Photo Album Wizard adjust the size of your graphics to fill the available space. There's a discussion of the image resizing options available in Photo Album Wizard below. Preserve Aspect: Disable this option to tell the Photo Album Wizard to crop your picture to fill the entire image area of the inside pages, if the Resize Picture to Fit option has been enabled. Enable it to keep your entire image visible. Frame Thickness: If this value is set to something larger than zero, beveled frames will be added to the inside pages of your presentation. Show Image Previews: Enable this option to have the page preview window display your currently selected picture. Disable it to have it display the tiger. You might want to disable this option if you use really huge graphics or you're running on a very slow machine. Note that the Next button of the Select Pictures panel will be disabled until you select one or more image files. 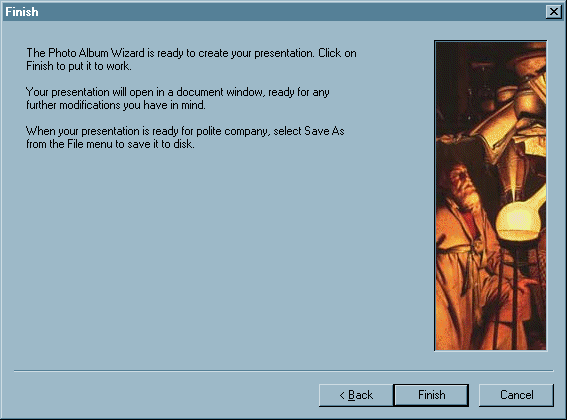 By default, Photo Album Wizard will resize the graphics you provide it with to create an attractive presentation. It's worth knowing a bit about what it does when this happens. There are three distinct modes in which a graphic can be imported by Photo Album Wizard: Resize to best fill your page: Your graphic will be resized to fill the entire available image area. As the aspect ratio of your picture and that of the image area will probably not be the same, your picture may have its edges cropped off to make it fit. This typically results in the most attractive presentation pages for a photograph album, albeit only if there's nothing of interest at the edges of your pictures. The Resize Picture to Fit option should be checked, and the Preserve Aspect option should be unchecked. Resize to best display the picture: Your graphic will be resized to fill the image area of your page in one dimension only. The entire graphic will appear – with no cropping – but probably without entirely filling your page. The Resize Picture to Fit option and the Preserve Aspect option should both be checked. Don't resize your picture – use it at its original dimensions: Your graphic will be imported at its natural size, and centered on the page it's to become part of. This will result in the best image quality, as resizing images degrades them at least a bit, but it assumes that you've chosen graphics which are of suitable dimensions for the pages they're to become part of. Graphics used this way will be cropped if they're too large for the image area of your pages. The Resize Picture to Fit option and the Preserve Aspect option should both be unchecked. True-colour images resize with far fewer aberrations than do images with 256 colours or less. See the Introduction to Graphic Files installed with this software for more about the differing colour depths of image files.
Presentation WizardÆs Radio Button objects will create conventional Windows radio buttons. You can add a Radio Button object to a Presentation Wizard page by right-clicking anywhere on the background area. Select Insert from the menu which appears, and then Radio Button from the Insert sub-menu. You can edit an existing Radio Button object by double-clicking on it, or by right-clicking on it and selecting Edit from the menu which appears. See the section of this document which deals with the Page Editor for more about adding, deleting and editing objects. The Radio Button editor includes the following fields: Title: The Title field of the Radio Button editor defines the text which will appear in a Radio Button object Left and Top: The Left and Top fields will allow you to define the location of the upper left corner of a Radio Button object. Width and Depth: The Width and Depth fields will allow you to define the size of a Radio Button object. Number: The Number field specifies the number of a Radio Button object. Visible: The Visible option defines whether a Radio Button object is visible. Checked: If you enable the Checked field, your radio button will be initially displayed checked. Enabled: Enable the Enabled item to create a radio button which is enabled and ready to accept clicks. Disable this item to create a disabled radio button – one which will presumably be enabled by a later notification. Notify: Enable this item to have the page object selected by the Target Object control notified when someone clicks in your radio button. Target Object: This item selects the page object to be notified when someone clicks in your radio button. Users who are relatively new to Windows might well wonder why these objects are referred to as radio buttons. Unlike check boxes, radio buttons are typically used in groups, such that when you select one button in the group, it unselects whichever button had previously been selected. This is analogous to the buttons on an automobile radio, hence the name. The analogy works better if you drive a 1969 Thunderbird with a mechanical radio, in which the selected buttons physically move. Note that radio buttons on a Presentation Wizard page only know how to manage one group per page. If you want to create multiple radio button groups and have them behave independently, youÆll need to write applets to manage them.
The Setup dialog can be accessed by selecting Setup from the File menu, or by clicking on the Setup button in the tool bar. Add Navigation Buttons to New Pages: If this item is enabled, each new page you add to a presentation will be provided with First, Previous, Next and Last Button objects. These buttons can be deleted if you wish. Disable this item to inhibit the addition of these buttons to new pages. By default, the navigation buttons added to new pages are placed relative to the lower right corner. You can configure Presentation Wizard to place them relative to one of the other three corners if you like by editing the PRSPRO.INI file. Presentation Wizard must not be running when you edit PRSPRO.INI. You must use the Windows NotePad application to edit this file, not a formatted word processor, such as Word or WordPad. To change the default navigation button locations for Presentation Wizard, do the following:
Applet Stack Size: This item sets the initial stack size for new applets. See the discussion of stacks in the ANIMAL reference document. Insert Blank Page in New Documents: Enable this item to have Presentation Wizard automatically add your first page to new documents. Data Compression: This item defines the amount of compression used when saving Presentation Wizard documents. Setting this value to one will cause Presentation Wizard to store images with light compression. Setting it to nine will result in the most aggressive possible compression. Better compression takes considerably longer – you might want to set this value to one while youÆre developing a presentation, and then to nine for the final save. Default View Mode: This item sets the default view mode for new document windows. See the discussion of the tool bar elsewhere in this document. Maximize Paint: Enable this item to cause Windows Paint to be maximized when it's called from an Image block editor. Disable it to allow Windows Paint to open normally. Optimum Vertical Windows: Enable this item to have Presentation Wizard's document windows adjusted to use as much of the vertical window space as possible. Disable it to have them created at the default size for a document window. Note that if this item is enabled, the default vertical window size will leave a gap between it and the bottom of the Presentation Wizard application window to allow for minimized documents. Prompt to Save Page Changes: If you enable this item, the Presentation Wizard page editor will prompt you to save the changes youÆve made to your page. If itÆs disabled, it will just save them for you without asking. Registration Code: Your registration code will be provided when you register Presentation Wizard. If you received Presentation Wizard on an Alchemy Mindworks installation CD-ROM, the code will be on your invoice in the line item for Presentation Wizard. It will look like this: Presentation Wizard REG # 12345-12-67890-88 $20.00 If you have received a confirmation e-mail message after registering Presentation Wizard, the code will appear in this message, like this: 1 Presentation Wizard REG CODE 12345-12-67890-88 Presentation Wizard registration codes are all 17 characters long, in the form of one five-digit group of numbers, a dash, one two-digit group of numbers, a dash, a second five-digit group on numbers, a dash and a final two-digit group of numbers. You must enter your code exactly in the Registration Code field to successfully register Presentation Wizard. The dashes separating the digit groups are not entered.
Registration Name: Your registration code is a complex checksum based on the characters of your name. If your name is not entered correctly in the Registration Name field, your registration code will not be accepted. Your registration name is printed on your invoice and is included in the confirmation e-mail message you received when you registered Presentation Wizard. It must be entered exactly – all the characters, spaces and punctuation in your registration name as it is provided to you must match what you enter in the Registration Name field. Search for Paintbrush: If this item is enabled and Windows Paint – the MSPAINT.EXE file – is not found when Presentation Wizard boots up, the software will search your had drive for it. Disable this item if Windows Paint is not on your system. Note that if you have Windows Paint on your system, and Presentation Wizard has located it, this item will be ignored. Show Startup Window: Enable this item to have the startup logo window displayed when Presentation Wizard boots up. Show Tip of the Day: Enable this item to have the tip of the day displayed when Presentation Wizard boots up. Warn Before Deleting Multiple Blocks: Enable this item to be warned if you click on the Delete button or hit Del when you have multiple blocks selected in a document window. Warn Before Displaying Manual: Enable this item to be warned before the Presentation Wizard on-line manual function is activated.
A Presentation Wizard page can include graphics as Image and Static Image objects. Graphics can also be displayed from within Applets, which are discussed elsewhere in this document. Image objects allow for images which transition in and out of your pages with a selection of animated effects. Static Image objects do not allow for transitions, but they do support transparency. See the discussion of Image objects elsewhere in this document for more information. The images for Static Image objects are imported from PNG image files. In answer to the obvious question, Presentation Wizard will not import files in the GIF format, nor is it likely to in the future. GIF is an antiquated format with poor image quality and some legal issues. If you have source images in the GIF format which you wish to import into a Presentation Wizard document, we recommend that you use our Graphic Workshop Professional software to convert your pictures to PNG. Unlike other formats, the PNG format allows for a variety of transparency options, all of which are supported by Static Image objects. This includes full alpha-channel transparency, wherein each pixel in an image can be fully transparent, fully opaque or anything in between. Alpha channel transparency allows you to create graphics which appear to blend with whatever is behind them. Left and Top: The Left and Top fields will allow you to define the location of the upper left corner of a Static Image object. Width and Depth: The Width and Depth fields will allow you to define the size of a Static Image object. Number: The Number field specifies the number of a Static Image object. Drawn: The Drawn item tells Presentation Wizard to remap rather than dither your image if it finds itself confronted with a 256-colour display adapter. See the Introduction to Graphic Files document installed with this application for more about this. The Drawn setting is ignored on machines which can display more than 256 colours. Paint: Click on the Paint button to open your image in a Paint window for editing.
The System Information dialog will provide you with an overview of the configuration of your computer. This can be useful in unraveling configuration issues. It includes the following: Screen Width and Screen Depth: These are the dimensions in pixels of your current screen display mode. Network Present: If this field is set to Yes, Windows is of the opinion that your computer is connected to a network of some sort. Slow Machine: This field indicates Windows' assessment of the speed of your computer – don't take it personally. Windows Version: This is the internal version number for your installation of Windows. Machine Owner: This is the owner name used when you installed Windows. Organization: This is the organization or company name used when you installed Windows. Colour Depth: The last item in the System Information dialog indicates the number of colours which your current Windows screen driver can display without dithering. If this number is 256 or less, Presentation Wizard is running a lot slower and looking a lot uglier than it needs to. See the Drivers document for help in reconfiguring your Windows screen driver.
Presentation WizardÆs Text objects will display text. A text object can use any font you like, with your selection of sizes and special effects. You can add a Text object to a Presentation Wizard page by right-clicking anywhere on the background area. Select Insert from the menu which appears, and then Text from the Insert sub-menu. You can edit an existing Text object by double-clicking on it, or by right-clicking on it and selecting Edit from the menu which appears. See the section of this document which deals with the Page Editor for more about adding, deleting and editing objects. The Text editor includes the following fields: Left and Top: The Left and Top fields will allow you to define the location of the upper left corner of a Text object. Width and Depth: The Width and Depth fields will allow you to define the size of a Text object. Number: The Number field specifies the number of a Text object. Padding: The Padding field defines the space between the edge of a text object and the rectangle which actually encloses the text. Padding is expressed as a percentage of the font size. Text which runs right up to the edge of the frame that encloses it looks gauche and unprofessional – not at all new millennium. Visible: The Visible option defines whether a Text object is visible. Transparent: If you enable this option, your text will be displayed against a transparent background. If you disable this option, your text will be displayed against a rectangular background with its colour determined by the Background colour button. Text Colour: This colour button will define the colour of your text. Background: This colour button will define the colour of the rectangle in which your text will appear if the Transparent option has not been enabled. Justification: This control group will set the justification for your text within the rectangle which encloses it. Font: Click on the Font button to select the typeface and font attributes for your text. Clicking in the font sample window will also open the Font dialog. Highlight and Shadow: This group of controls will allow you to add an optional highlight and shadow to your text. Depending on how much padding you allow, this facility can make your text appear three dimensional, or provide it with a drop shadow. The text field of a Text object editor – the large editing window near the bottom of the dialog – defines the text which will appear in a Text object Text objects can contain as much text as you like, subject only to the limits of good taste and the likelihood that anyone will actually read two dozen paragraphs of five-point type. A note about fonts: You can set the text in a Text object in any font you like, with one minor catch. While Presentation Wizard will use any font you tell it to, the font in question will have to be installed on whichever machines your presentations run on as well. If you design a presentation to use a font called Nuclear Accident Sanserif and Nuclear Accident Sanserif doesn't happen to be available on the machines that ultimately run your presentation, all your text will appear in another font – most likely Courier. See the discussion of Fonts and Font Embedding elsewhere in this document for more about Presentation Wizard's available solutions for this issue.
Presentation WizardÆs Timer objects can be used to wait for a while before notifying another object. Timers can be used to automatically change pages after a predetermined period, to pause the action of an animation and to repeat things like sounds and image transitions. A timer object begins timing upon receiving a notification from another page object, or when your page is first displayed if it was created with its Enabled option selected. When its time runs out, it performs a specified action – among other things, this can involve notifying another object. You can add a Timer object to a Presentation Wizard page by right-clicking anywhere on the background area. Select Insert from the menu which appears, and then Timer from the Insert sub-menu. You can edit an existing Timer object by double-clicking on it, or by right-clicking on it and selecting Edit from the menu which appears. See the section of this document which deals with the Page Editor for more about adding, deleting and editing objects. Note that Timer objects appear as icons in the Presentation Wizard page editor. They will be invisible in your final pages. The Timer editor includes the following fields: Left and Top: The Left and Top fields will allow you to define the location of the upper left corner of a Timer object. Number: The Number field specifies the number of a Timer object. Duration: This is the number of seconds the timer will wait before it initiates whatever the Action combo tells it to do. Enabled: Enable the Enabled item to create a Timer object which begins timing as soon as the page it appears in is displayed. Disable this item to create a disabled Timer object – one which will presumably be enabled by a later notification. Action: The Action combo box in the Timer editor defines what the timer being edited will do when its time has elapsed. The options are: Do Nothing: Nothing will happen when the timer runs out. First Page: Jump to the first page of your presentation. Previous Page: Jump to the previous page of your presentation. Next Page: Jump to the next page of your presentation. Last Page: Jump to the last page of your presentation. Quit: End your presentation. Notify: Notify another object on the current page. The object to be notified can be specified using the target object combo box. Disable: Disable another object on the current page. The object to be disabled can be specified using the target object combo box. Jump to New Page: Jump to the page specified by the Target Page combo box. Show About Dialog: Display the About dialog for your presentation. The About dialog will display the About dialog text defined in the Header block for the current presentation. This is identical to what happens if someone selects About from the System menu of a presentation. Show Page Menu: Display a menu of all the pages in your presentation, allowing a user to jump to one of them. This is identical to what happens if someone selects Page Menu from the System menu of a presentation. Open Document: Attempt to open the document defined in the Document field. See discussion of the /NEX switch in the section of this document which deals with Button objects. Be careful in creating timers that do things like opening a document window or changing pages – used frivolously, this facility can make your presentation appear to have been haunted. Target Object: This field defines the page object to be notified or disabled if the timer being edited is so configured. Target Page: This field defines the page to jump to if the timer being edited is so configured.
The Presentation Wizard tool bar provides access to the most commonly used functions supported by the software. All its buttons duplicate functions available in the main menu, but buttons are easier to get at than menus. The tool bar buttons have associated tip windows – if you forget what a button does, place your mouse cursor over it for a moment and a window will appear to explain its function. The functions dispatched by the tool bar always pertain to the topmost document window if you have multiple documents open. The tool bar buttons which process blocks will be disabled if no files are selected in the topmost document window. Here are all the tool bar buttons. Each of these functions is explained in detail elsewhere in this document.
The Undo item of the Edit menu will undo the most recent change you've made to the uppermost document window. This item will be disabled if there's nothing to undo.
The View function of the Presentation Wizard Block menu can also be accessed through the View button in the tool bar. Select View to view your presentation. Hold down the Shift key and click on View to begin viewing your presentation at the currently selected block. Click with your right mouse button to exit a View window.
Presentation WizardÆs Wave objects contain sampled sounds imported from Windows WAV files. You can add a Wave object to a Presentation Wizard page by right-clicking anywhere on the background area. Select Insert from the menu which appears, and then Wave from the Insert sub-menu. You can edit an existing Wave object by double-clicking on it, or by right-clicking on it and selecting Edit from the menu which appears. See the section of this document which deals with the Page Editor for more about adding, deleting and editing objects. Note that Wave objects appear as icons in the Presentation Wizard page editor. They will be invisible in your final pages. The Wave editor includes the following fields: Left and Top: The Left and Top fields will allow you to define the location of the upper left corner of a Wave object. Number: The Number field specifies the number of a Wave object. Visible: The Visible option defines whether a Wave object is visible – fairly obvious, this one. Enabled: Enable the Enabled item to create a Wave object which begins playing as soon as the page it appears in is displayed. Disable this item to create a disabled Wave object – one which will presumably be enabled by a later notification. Notify: Enable this item to have the page object selected by the Target Object control notified when the Wave object in question finishes. Target Object: This item selects the page object to be notified when the Wave object in question finishes. Preview: Click on this button to hear the sound stored in the Wave object being edited.
This document and all the other documentation included with Presentation Wizard is copyright © 1995, 1996, 1997, 1998, 1999, 2000, 2002 Alchemy Mindworks. It may not be reproduced in whole or in part or transmitted in any form save as a component part of the Presentation Wizard software without the explicit written permission of the copyright holder. Unauthorized use of this document or any portion thereof may result in severe criminal and civil penalties. Alchemy Mindworks accepts no responsibility for any loss, damage or expense caused by your use of the information in this document, however it occurs. This product is marketed under license from Alchemy Mindworks Corporation.
|
|


